
This project is in progress. The plan is simple: Run teak planks from the cockpit to the bow, for a splendid overhaul of my 1980 Pearson 30.
Exhaustive Shopping List
Teak wood, plastic boards, and hardware

- Teak - Exotic Lumber for local buy in Annapolis, MD
- White Expanded PVC Plastic Sheet
- Screws, Washers and Nuts:
- West Marine Machine Screw SS-FHP #8-32x2 Model #536029
- West Marine Nut-SS Hex #8-32 Model #338558
- West Marine Washer-316SS Flat #8x3/8 Model #338657
Bonding and Sealing
- CA glue for miter joints on frames
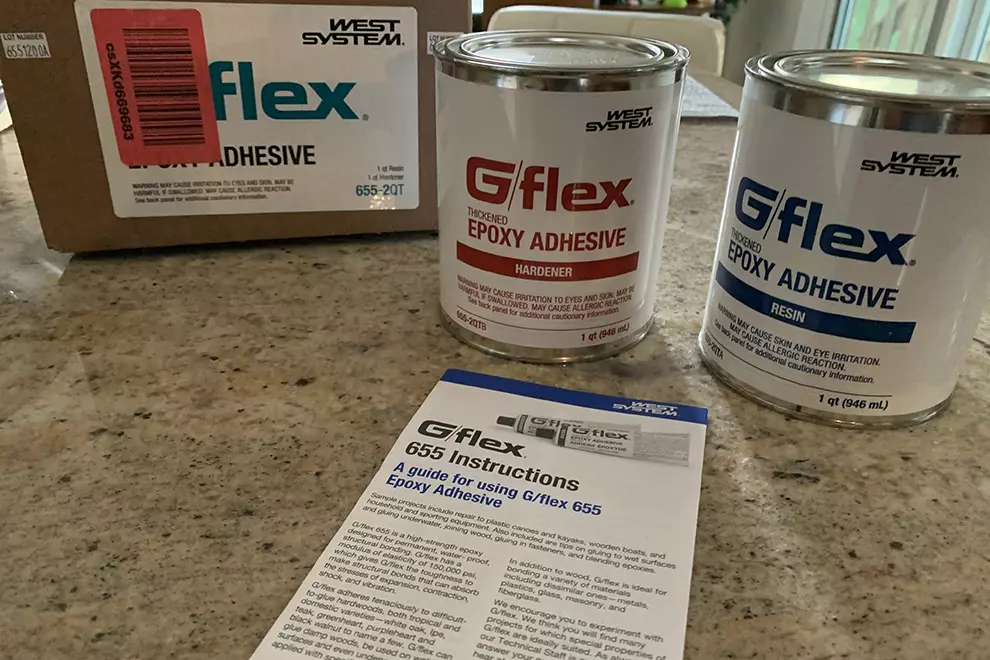
- West System G/Flex 655 Thickened Epoxy Adhesive to bond Teak to plastic
- Boatlife Life Caulk to bond plastic to deck
- BoatLIFE Two-Part Life Calk BTL-1050 -- Gallon Kit - Black Pourable, and BoatLIFE Bondbreaker to caulk deck seams
Expandables
- BoatLIFE Bonbreaker to break bond from plastic when bonding Teak to plastic
- 1/8" Tile Leveling System Clips
- Pencil 2HB Soft for thick
- Pencil 4H for precise
- 1.88 in. x 60 yds. Blue Tape
- Isopropyl Alcohol Wipes
- Sandpaper (hand and disc, grits 100, 150, and 220)
- TOOLBOX Z400 White Rags (200-Count)
The Shop
The Machines
- Miter saw with stand
- Planer with stand
- Band Saw
- Scroll Saw
- Tablesaw
- Circular saw equipped with Kreg ACCU-Cut circular saw track
- Laminate Trimmer: DEWALT DWE6000 4.5-Amp Single Speed 1/4-Inch Laminate Trimmer with 1” Carbide Flush Trimming Router Bit and 1/4 in. Radius Rounding Over Bit
The Tools
- Heat Gun
- Tape measurer (1/16 fractions)
- Digital 5 in. Angle Finder
- Digital Sliding T-Bevel/Angle Finder
- Contour Gauge Profile Tool, GOXAWEE Irregular Shape Duplicator 5" & 10"
- Shopvac with Dust Bags
- 4 Bessey 12 in. K-Body Clamps
- 2 Kreg 6 in. Face Clamps
- 2 Armor Auto-Adjust P7-HH Horizontal Dog Clamps
- Bessey Tools VAS-23 2K Variable Angle Strap Clamp with 4 Clips
- Orbit Sander, Variable Speed
- Hand sander
- Plywood templates for clamping down and edging with laminate trimmer (see template instructions, end of webpage)
Measurements
Initial cuts
- Width: 2.25”
- Length: Custom + 3”
- Thickness: .36”
- Seams: 1/8th in.
Final cut
- Width: 2”
- Length: Custom
- Thickness: .35”
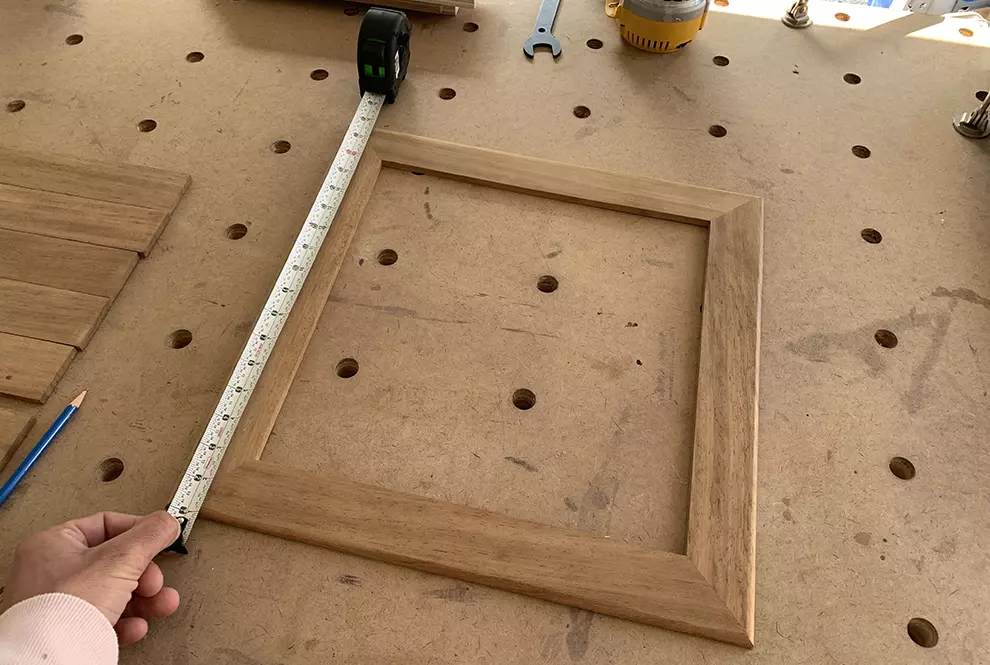
Squaring, Marking, & Cutting Stock Teak
- Miter saw to largest custom length + 3”.
- Plane to flatten one side.
- With a pencil, mark the planed side.
- Bandsaw .4” thick boards.
- Plane down other side so that final board thickness equates .36” (sanding will bring it down to “.35”).
- Tablesaw to 2.25” width.
- Joint to 2.10” width.
- Sand in 3 phases, using grit 120, 150, & 220 . No need to sand the edges.
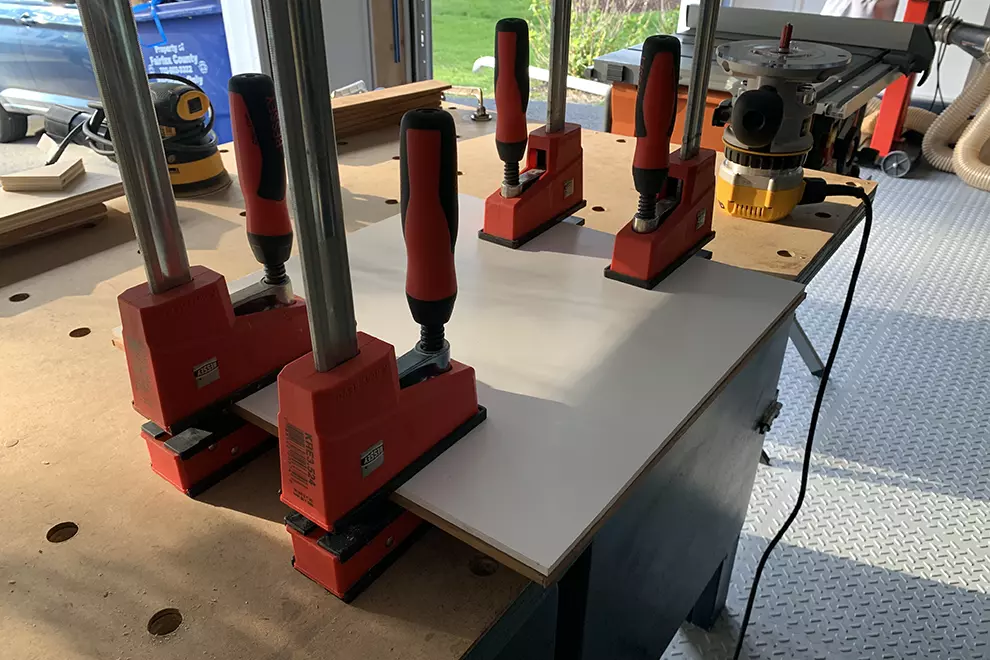
Cutting the PVC Plastic Sheet
Accuracy is key
- While on the boat, measure your defined shape by tracing along its edges with a pencil and a large ruler.
- Note down the measurement of all 4 angles, working clockwise starting port and aft.
- Note down the measurement of all 4 angles divided in half, to use as a reference when making the miter cuts of your frame.
- Note down the measurement of all 4 lengths, working in the same order and motion as you did with angles.
- At your workshop, replicate the shape on your plastic board using a pencil.
- Cut your plastic board to the shape’s exact dimensions. I use a circular saw and the Kreg ACCU-Cut solution for accuracy.
- Mark your angles on the board with # 1. 2, 2, and 4.
Preparing the mitered frame
- Cut 4 boards to the 4 defined plastic lengths + 3"
- Pick which side of the boards you like best and align them to form a frame.
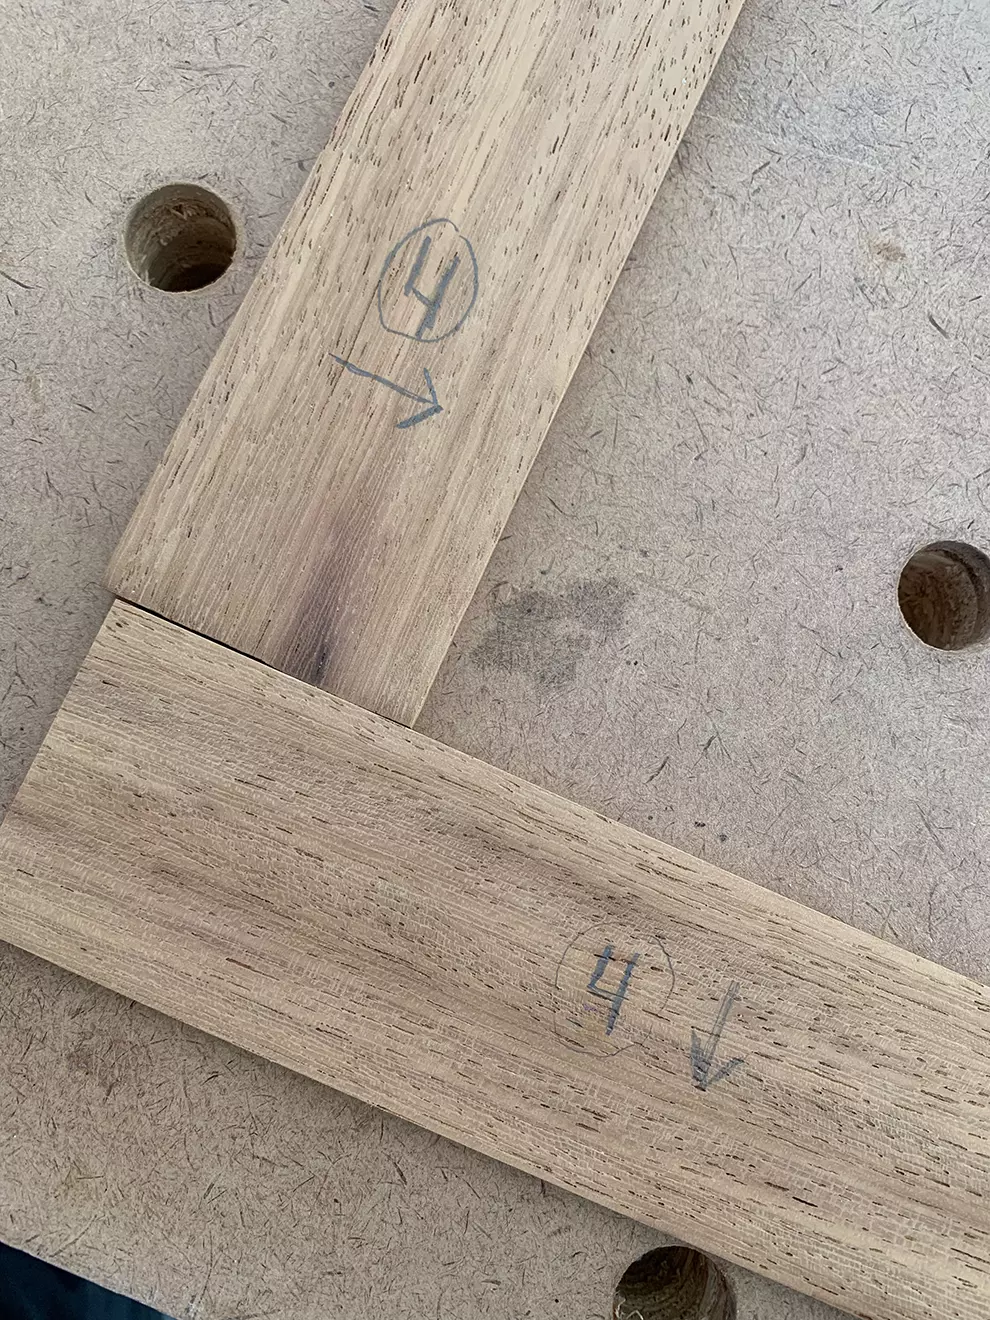
- With a HB2 pencil, clearly mark down all angle numbers keeping away from the edges to be cut off. Draw arrows by your angle numbers, to indicate the grain direction:
- Write “RIGHT” at the center of the boards, to indicate this side will face up on the deck.
- One by one, flip the boards and make the same notations on the other side, substituting “RIGHT” with “WRONG." This is the side that won't be seen. It will be glued to the plastic frame.
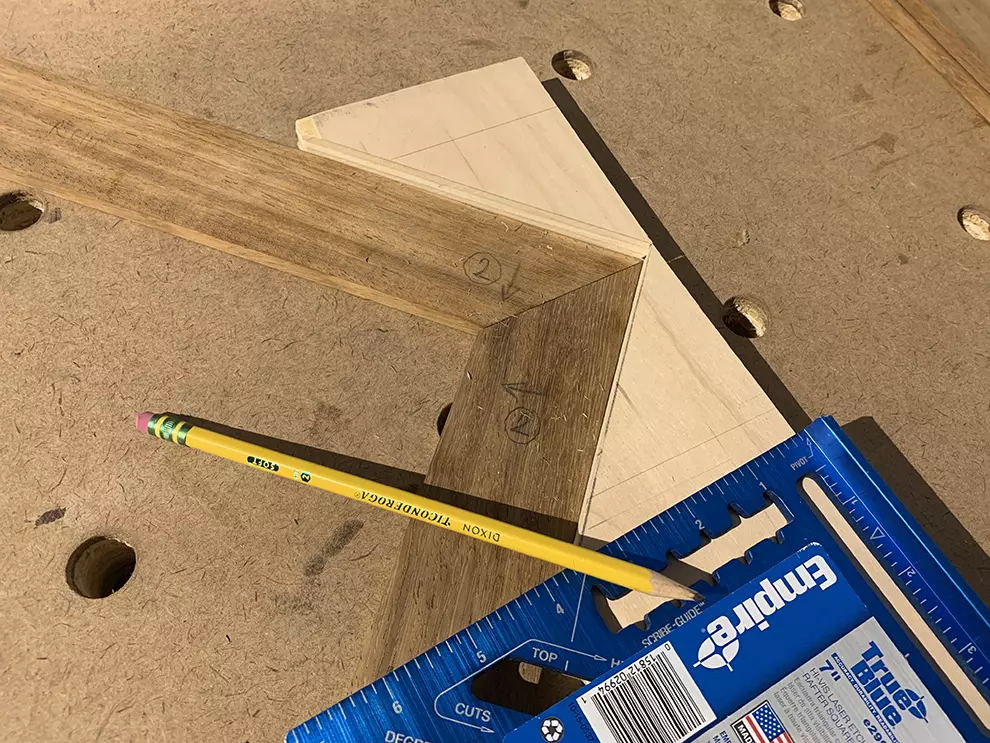
- Pencil draw halved angle #2 on board #1.
- Miter cut angle #2 leaving as little bleed as possible.
- Place your board under the appropriate template, and clamp it down:
- Flush trim your angled cut with the router, following the direction of the grain.
- Grab board #2. Align it to the plastic board along its respective length, and pencil draw along the edge that comes out.
- Put the plastic aside. Superpose board #1 alongside the pencil line drawn on board #2. Pencil draw halved angle #2 on board #2.
- Repeat step #9 to #11 on board #2.
- Joint down to 2" the inner frames of boards #1 and #2.
- Lightly sand mitered edges of board 1 & 2 with 220 hand sander.
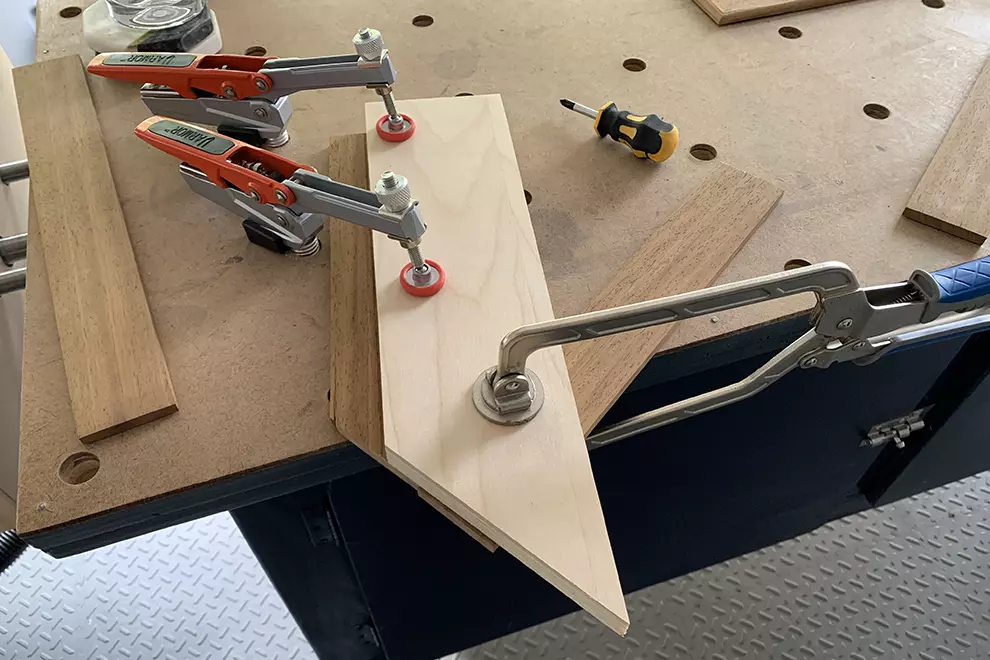
- To joint board #1 and #2 together, saw two cauls (triangle cut-offs) out of plywood. Align them against the miters, angling them so that together the shape measure a full 180 degrees:
- For each caul, stick a layer of blue tape on the edge to be glued to the board's edge.
- Using a longer strip of tape, do the same on the board's edge to be glued to the caul.
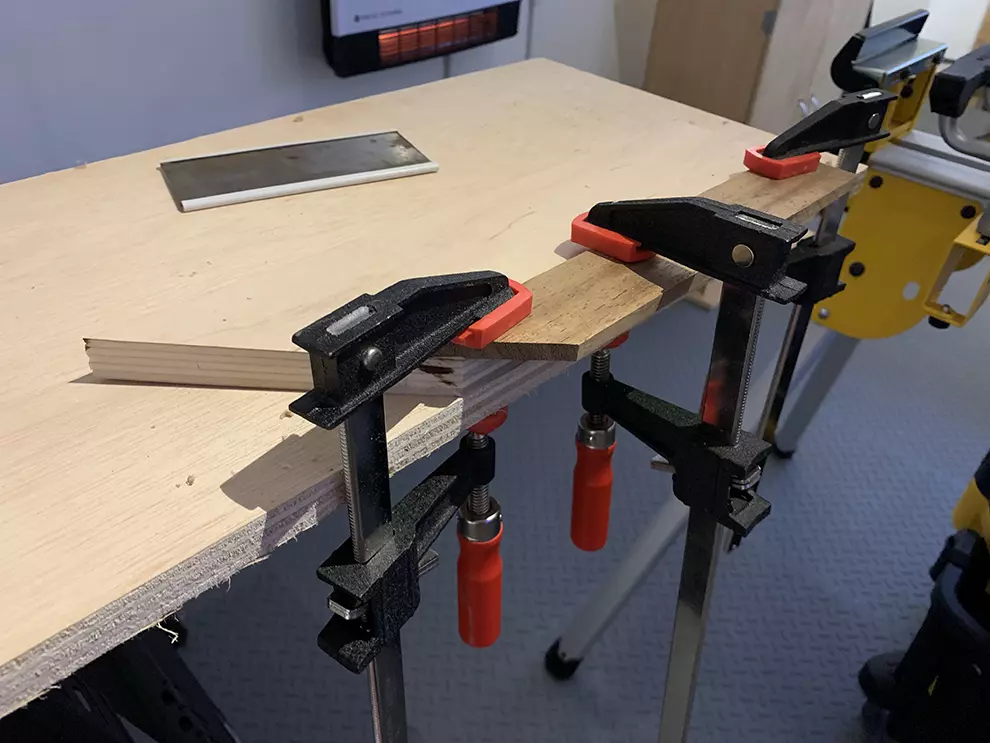
- Glue the cauls to the outer edges of the boards using CA glue.
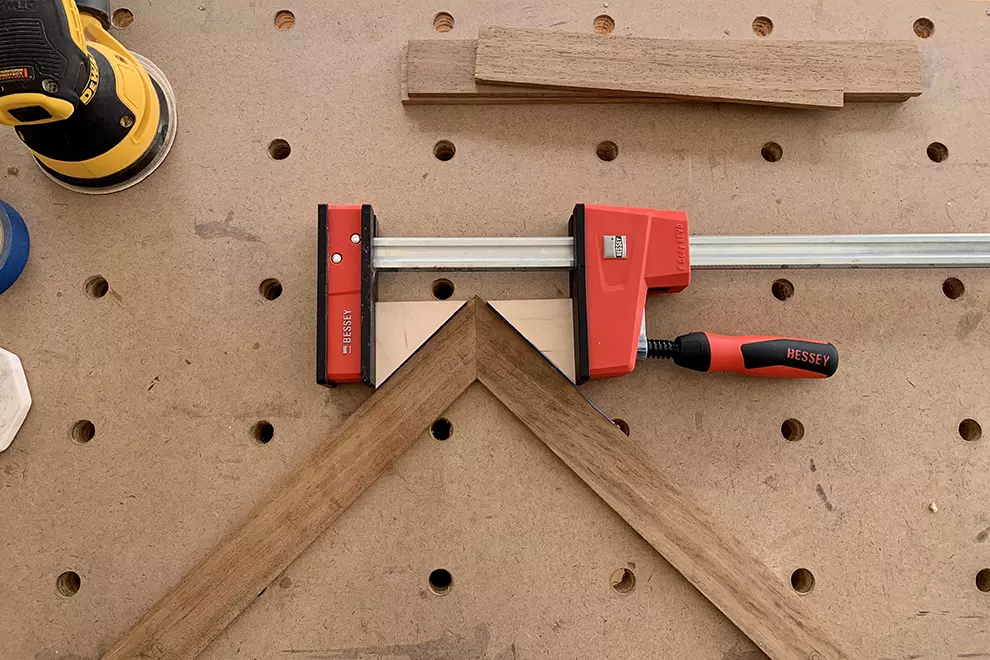
- Apply wood glue to the miters.
- Join board #1 and #2 together:
- Apply clamping pressure to the joint, a clamp oriented perpendicular to the joint and pressing against the cauls.
- After the glue dries, use a mallet to pop off the glue blocks.
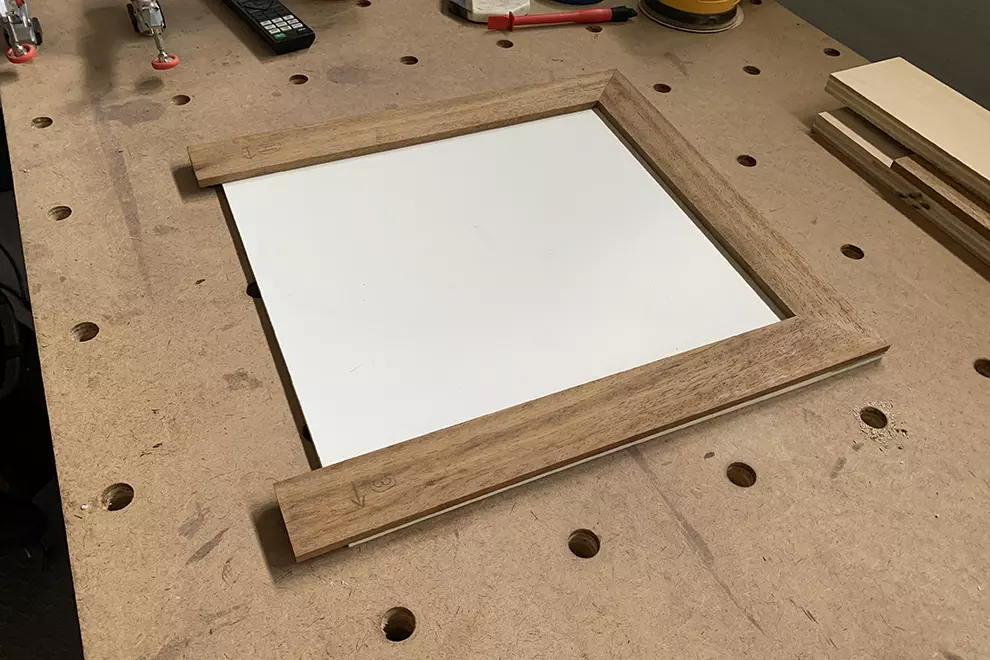
- Repeat steps for board #3 so that the shape is 3/4th complete. This cautious approach to miter framing ensures the 4 boards align themselves perfectly to the plastic board:
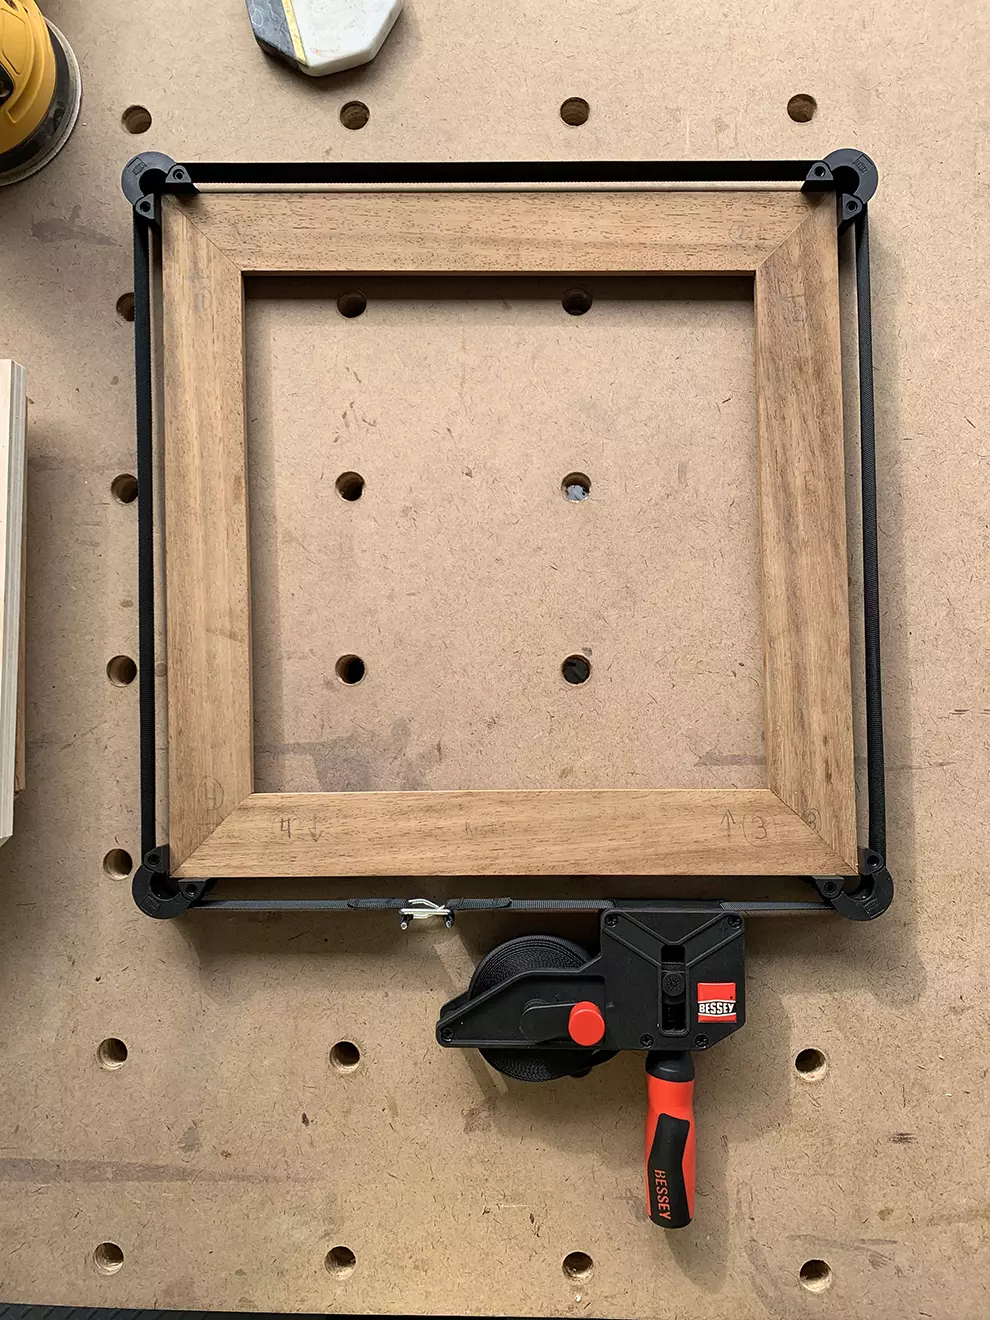
- For the final board, use an Angle Strap Clamp with 4 Clips. Let glue dry before proceeding to next step:
- Clamp down the frame to the plastic board. Flush trim your plastic to match the frame:
- Round corners with router:

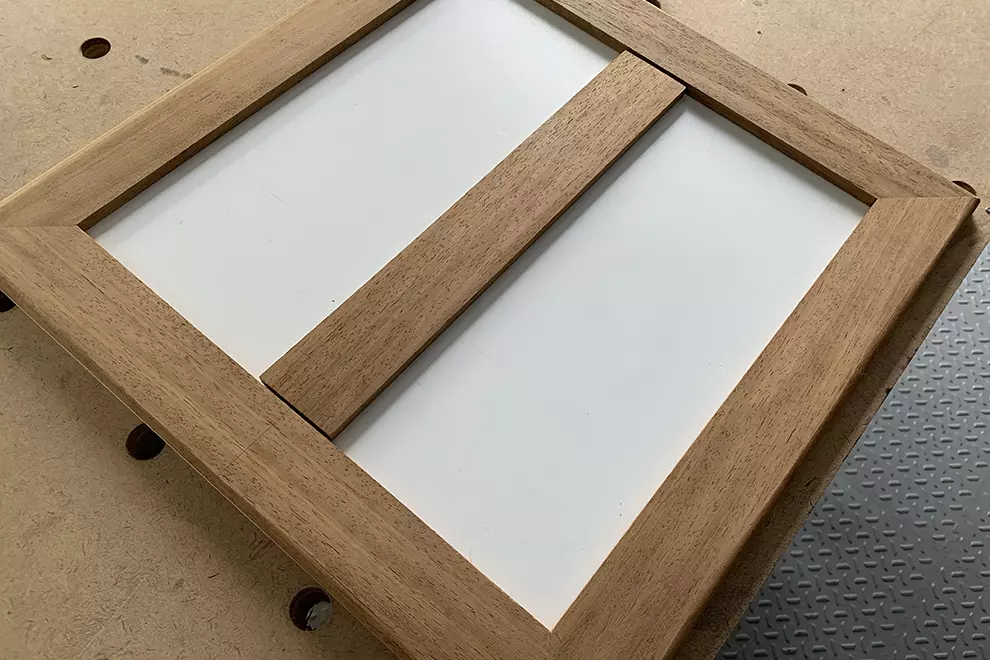
Gluing down the inner boards on the PVC plastic sheet

- Clean plastic and Teak by applying Isopropyl Alcohol. Wipe with a clean, dry paper towels before solvent dries.
- With a pencil, draw the horizontal center line on the plastic board. To find the perfect middle (Y y/16) for each end of the frame, measure the length of a border (X x/16) using a standard ruler with 16 bars per inch, and follow the formula: X x/16 -> X/16 = X.XXXX ->X.XXXX / 2 = Y.YYYY -> YYYY x 16 = y ->Y y/16
- Repeat steps on both sides of the board and the frame, noting down grain diction as well. Mark "LEFT" for left side, "RIGHT" for right side, "RIGHT" for the top size, and "WRONG" for the side to be epoxied down to the plastic board. Draw your measurements on the "RIGHT" side of the board and the frame, and then use your Contour Gauge Profile Tool to quickly duplicate markings on the "WRONG" sides:
- Place the board underneath the frame and mark the left cut:
- Make the cut to precision, first with Miter Saw and then with router.
- Repeat for the right side of the board, substracting 1/4th of an inch to the length between the left edge and right edge of the board, so that 1/8th of an inch will separate the board from each side of the frame once epoxied down:
- Position the board perfectly on the plastic board, leaving the frame on, and With a pencil, mark its shape:
- Remove the frame. Remove the board. You are now ready to prepare your Epoxy Mix:
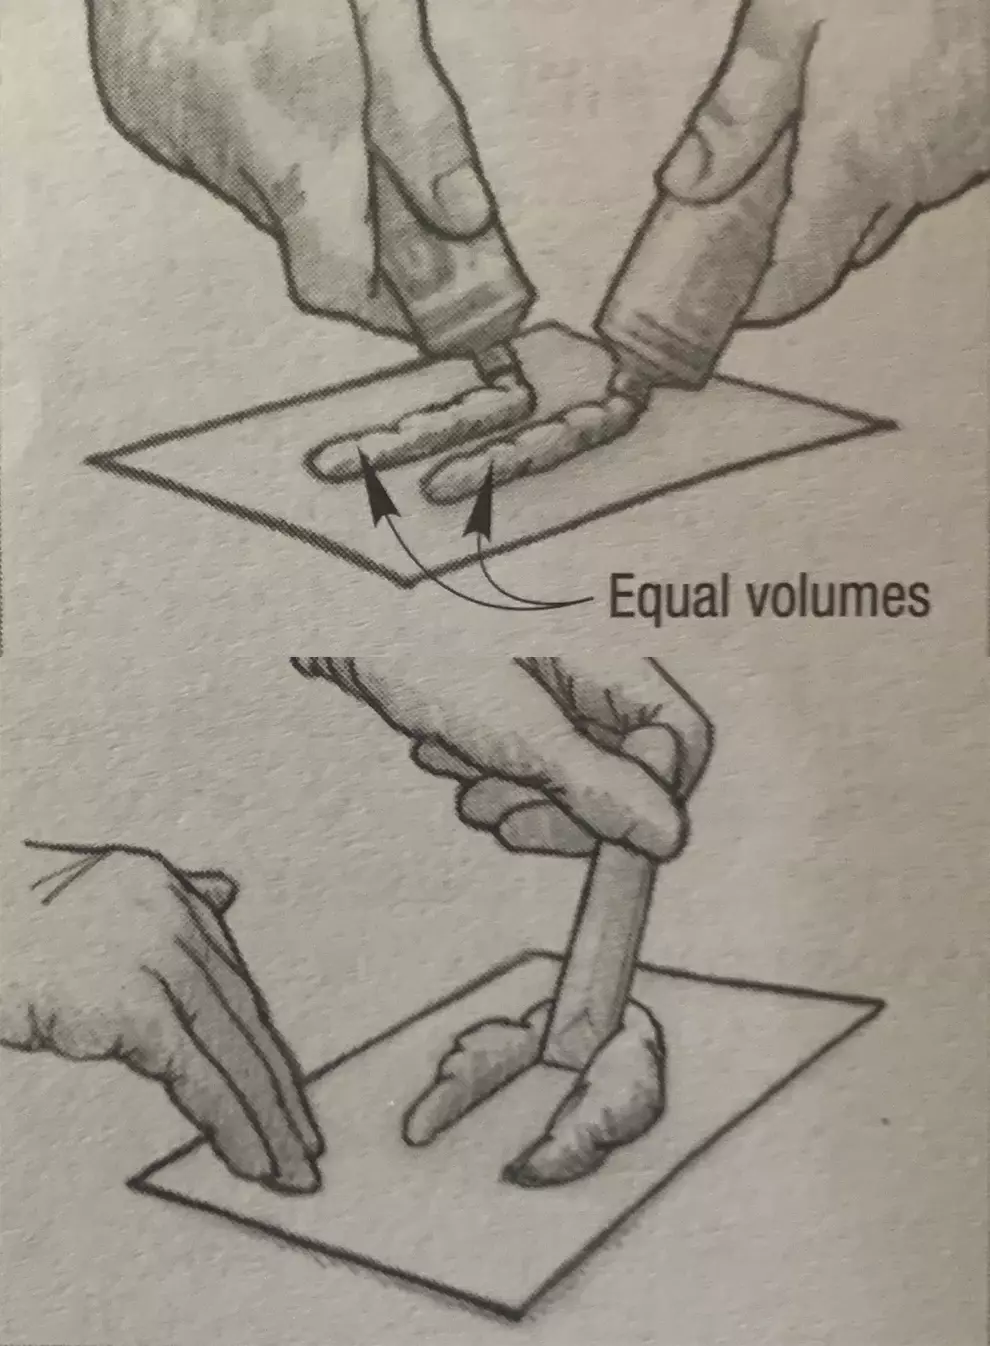
- Mix your G/flex 655 by dispensing equal volumes of resin and hardener onto a mixing pallet. Use the square end of a mixing stick to thoroughly blend the resin and hardener. You will have about 45 minutes to apply the mixture before it begins to gel and up to 75 minutes to assemble and clamp parts after it is initially applied. The mixture will solidify in 3-4 hours and reach a workable cure in 7-10 hours. The adhesive may be sanded, clamps can be removed, and joints can be moderaly loaded. Wait 24 hours before subjecting joints to high loads. G/Flex 655 cures faster in warmer temperatures and slower in cooler temperatures. G/Flexx 655 will cure in temperatures as low as 40 degrees Farenheit (4 degrees Celsius):
- With your heat gun, flame treat the plastic by passing the flame across the surface quickly. Allow the flame to touch the surface, but keep it moving - About 12 to 16 inches per second. No obvious change takes place, but the flame oxidizes the surface and dramatically improves adhesion.
- Apply the epoxy mixture to both plastic and Teak and clamp the components in position before the epoxy begins to gel - about 75 minutes at 72 degrees Farenheit (22 degrees Celsius). Use just enough clamping pressure to squeeze a small amount of epoxy out of the joint. Leaving some glue in the joint increases bonding strength. Allow the epoxy to cure thoroughly before stressing the joint.
- Clean excess epoxy with an Isopropyl Alcohol wipe.
- To be continued...


Additional Notes & Resources
How to make a template to flush trim edges
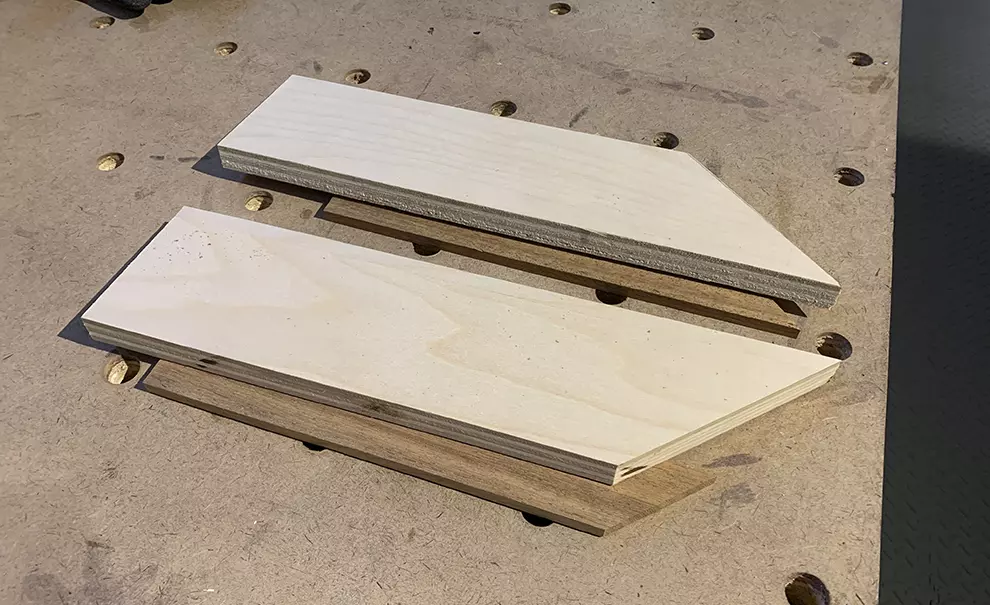
- With your miter saw, make 45 degree diagonal cuts on two piece of plywood, 4 inches wide and a foot long.
- Make 35 degree diagonal cut on two boards of teak, 2 inches wide, .34" inches thick, and a couple inches under a foot in length:
- With clamps, glue the teak to the plywood by aligning the diagonal end along the diagonal edge of the plywood, and letting its length extend past the plywood board, so that at least 4 inches are left open to place the board to be trimmed and give enough space for your router to come in.
Disclaimer
This guide is in progress. Use at your own risk! These resources are for personal references first, and I claim no expertise, know-how, accuracy, intelligence, or anything else of the kind.